What Is The Least Expensive Way To Redo Kitchen Cabinets?
What Is The Least Expensive Way To Redo Kitchen Cabinets? If you’re looking to revamp your kitchen cabinets without breaking the bank, we’ve got you covered! In this article, we’ll explore various budget-friendly options to transform your kitchen without sacrificing style or quality. From a fresh coat of paint to creative DIY solutions, discover the least expensive ways to give your kitchen cabinets a stunning makeover that won’t strain your wallet. So, let’s dive into the world of affordable kitchen cabinet renovations and roll up our sleeves for some exciting transformations!
Painting Cabinets
Benefits of painting cabinets
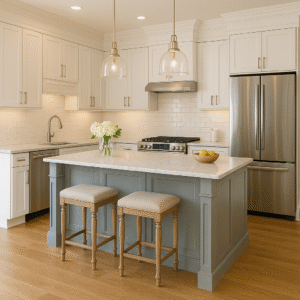
Painting cabinets is a cost-effective way to give your kitchen a fresh and updated look without spending a fortune on a full cabinet replacement. By choosing the right paint color, you can completely transform the atmosphere and style of your kitchen. Additionally, painting cabinets allows you to customize the appearance to match your personal taste and current design trends. It also provides an opportunity to cover up any imperfections or outdated finishes on the cabinets, giving them a new lease on life.
Steps to paint kitchen cabinets
- Start by removing all cabinet hardware, including handles and hinges.
- Clean the cabinets thoroughly with a degreaser to remove any dirt, grease, or grime.
- Use a fine-grit sandpaper or a liquid deglosser to lightly sand the cabinet surfaces. This step helps the paint adhere better.
- Apply a primer to the cabinets to create a smooth surface and improve paint adhesion.
- Once the primer is dry, apply paint evenly on the cabinet surfaces using a brush or roller. Start with the inner edges and corners and work your way out.
- Allow the paint to dry completely, and then apply a second coat if needed.
- After the final coat of paint has dried, reattach the hardware to the cabinets.
Materials needed for painting cabinets
- Screwdriver
- Degreaser
- Sandpaper or liquid deglosser
- Primer
- Paintbrush or roller
- Paint
- Paint tray or bucket
- Drop cloths or plastic sheets for protection
Tips for painting cabinets
- Choose a high-quality paint specifically formulated for cabinets to ensure durability and longevity.
- Take your time to properly prepare the cabinets by cleaning and sanding them before painting.
- Use a paint sprayer for a smooth and professional-looking finish if you have experience or access to one.
- Consider removing the cabinet doors and drawers to make the painting process easier and more efficient.
- Allow ample drying time between coats to prevent smudging or uneven application.
- Don’t forget to label the hardware and keep them organized during the painting process for easy reattachment.
Refacing Cabinets
What is cabinet refacing?
Cabinet refacing involves replacing the cabinet doors and drawer fronts while keeping the existing cabinet boxes intact. This method allows you to update the appearance of your cabinets without the need for a complete replacement. The process of refacing cabinets typically also includes applying a matching veneer to the cabinet boxes to create a cohesive and uniform look.
Benefits of cabinet refacing
One of the main benefits of cabinet refacing is cost savings. Refacing cabinets is generally more affordable than completely replacing them, as it eliminates the need for purchasing new cabinets and performing extensive installation work. Additionally, refacing allows you to change the style and color of your cabinets while preserving the layout and functionality of your kitchen. It is a greener and more sustainable option compared to full cabinet replacement since it reduces waste and extends the life of your existing cabinets.
Steps to reface kitchen cabinets
- Start by removing all cabinet doors and drawer fronts, as well as the hardware.
- Thoroughly clean the cabinet boxes, doors, and drawer fronts to remove any dirt or grease.
- Measure and cut the new veneer panels according to the dimensions of the cabinet boxes, making sure to leave space for hinges and hardware.
- Apply adhesive to the back of the veneer panels and carefully press them onto the cabinet boxes, smoothing out any bubbles or wrinkles.
- Once the veneer is properly applied, use a router or utility knife to trim off any excess material.
- Install the new cabinet doors and drawer fronts, attaching them securely with hinges and screws.
- Finally, reattach the hardware and ensure that all doors and drawers are properly aligned and functioning.
Materials needed for cabinet refacing
- Screwdriver
- Cabinet doors and drawer fronts
- Veneer panels
- Adhesive
- Router or utility knife
- Hinges and screws
- Hardware for cabinet doors and drawers
Replacing Cabinet Doors
Why replace cabinet doors?
Replacing cabinet doors is an excellent option if you want to update the look of your kitchen while preserving the existing cabinet boxes. Over time, cabinet doors may become worn, damaged, or simply outdated, and replacing them can instantly rejuvenate the entire space. It allows you to change the style, color, or material of the doors to match your desired aesthetic and create a cohesive look in your kitchen.

Benefits of replacing cabinet doors
One of the significant benefits of replacing cabinet doors is cost savings compared to a full cabinet replacement. By only replacing the doors, you can achieve a fresh new look without the need for extensive renovation or installation work. Replacing cabinet doors also provides an opportunity to upgrade the quality and functionality of the doors, such as adding soft-close hinges or glass inserts. Additionally, it allows for easier customization, as you can choose from a wide range of door styles, finishes, and hardware options to suit your personal taste.
Steps to replace cabinet doors
- Measure the dimensions of the existing cabinet doors accurately.
- Choose the desired door style, material, and finish that complements your kitchen’s overall design.
- Order the new cabinet doors from a reputable supplier, ensuring they match the measurements and specifications of your existing doors.
- Remove the old doors by unscrewing the hinges from the cabinet boxes.
- Position the new doors onto the cabinet boxes, aligning them properly with the hinges.
- Secure the new doors by attaching them to the cabinet boxes using screws.
- Test the doors to ensure they open and close smoothly and adjust any alignment if needed.
- Finally, install the chosen hardware on the new cabinet doors, such as handles or knobs.
Materials needed for replacing cabinet doors
- Screwdriver
- New cabinet doors
- Screws
- Hardware (handles or knobs)
Adding New Hardware
Importance of adding new hardware
Adding new hardware to your kitchen cabinets is a simple and cost-effective way to update their appearance and enhance the overall style of your kitchen. The right hardware can add a touch of elegance, modernity, or uniqueness to your cabinets, depending on your personal taste and the desired aesthetic. It allows you to customize the look of your cabinets without investing in a complete renovation, making it an ideal option for those on a budget.
Choosing the right hardware
When choosing new hardware for your kitchen cabinets, consider the following factors:
- Style: Determine the overall style of your kitchen and choose hardware that complements it. For example, sleek and minimalist handles work well in contemporary kitchens, while ornate and decorative knobs may suit a more traditional or vintage-inspired kitchen.
- Finish: Select a finish that complements other elements in your kitchen, such as faucets, appliances, or lighting fixtures. Common finishes include brushed nickel, chrome, brass, or oil-rubbed bronze.
- Comfort and functionality: Ensure that the hardware feels comfortable to grip and operate. Opt for designs that are easy to use and ergonomically friendly, especially for high-traffic areas like the kitchen.
Steps to add new hardware to kitchen cabinets
- Measure and mark the desired locations for the new hardware on the cabinet doors or drawer fronts.
- Use a drill to create pilot holes at the marked locations to prevent the wood from splitting.
- Attach the hardware using screws or bolts, ensuring they are tightened securely but not overly tight.
- Test the hardware by opening and closing the cabinet doors or drawers to ensure smooth operation.
Materials needed for adding new hardware
- Measuring tape
- Pencil or marker
- Drill
- Screws or bolts
- New hardware (handles or knobs)
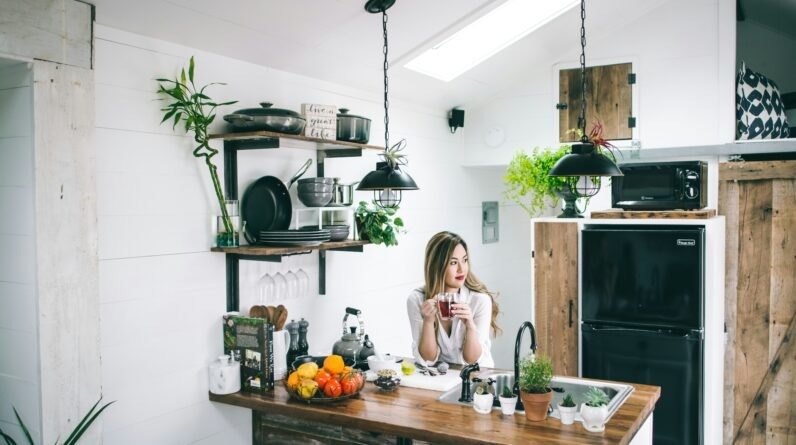
Installing Open Shelving
Advantages of open shelving
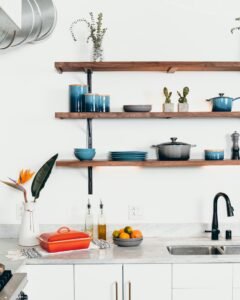
Open shelving is a popular trend in kitchen design due to its practicality and aesthetic appeal. Installing open shelving in your kitchen cabinets offers several advantages:
- Increased accessibility: Open shelves allow you to easily access and display commonly used items or decorative pieces, making them convenient for everyday use.
- Visual openness: Open shelving creates a sense of openness and spaciousness in the kitchen, especially if you have limited cabinet space or a small kitchen.
- Showcase style: It provides an opportunity to showcase your curated collection of beautiful dishes, glassware, or cookware, adding a personalized touch to your kitchen decor.
- Cost-effective: Installing open shelves is often more cost-effective compared to adding additional cabinets or storage solutions.
- Easy installation: Open shelves are relatively easy to install, requiring minimal tools and materials.
Steps to install open shelving in kitchen cabinets
- Empty the cabinets and remove all existing shelves.
- Measure and mark the desired locations for the open shelves inside the cabinets.
- Install shelf brackets or supports onto the sides of the cabinet walls using screws or adhesive, following the manufacturer’s instructions.
- Place the shelves onto the installed brackets, ensuring they are level and secured.
- Test the shelves for sturdiness by placing weight on them and making any necessary adjustments.
Materials needed for installing open shelving
- Measuring tape
- Pencil or marker
- Shelf brackets or supports
- Screws or adhesive
- Shelves
Applying Contact Paper
Benefits of applying contact paper
Applying contact paper to kitchen cabinets is a convenient and affordable way to refresh the appearance of your cabinets. Some of the benefits of using contact paper include:
- Cost-effective: Contact paper is significantly cheaper than other options such as paint or cabinet replacements.
- Easy installation: Applying contact paper requires minimal tools and skills, making it a suitable DIY project.
- Temporary solution: If you are unsure about a permanent change or live in a rental property, contact paper allows you to update your cabinets without making permanent alterations.
- Variety of styles: Contact paper comes in various colors, patterns, and textures, allowing you to find the perfect match for your kitchen decor.
Steps to apply contact paper on kitchen cabinets
- Clean the cabinet surfaces thoroughly to remove any dirt or grease.
- Measure the dimensions of the cabinet surfaces, including the height and width of the doors, drawers, and side panels.
- Cut the contact paper sheets to the measured dimensions, leaving an allowance for trimming.
- Peel off a small portion of the contact paper backing and align it with one edge of the cabinet surface.
- Gradually peel off the rest of the backing while smoothing the contact paper onto the surface, ensuring there are no air bubbles or wrinkles.
- Use a smoothing tool or a credit card to press out any air bubbles and ensure a smooth, even application.
- Trim any excess contact paper using a utility knife or scissors.
- Repeat the process for all cabinet surfaces.
Materials needed for applying contact paper
- Measuring tape
- Contact paper
- Utility knife or scissors
- Smoothing tool or credit card
Organizing and Decluttering Cabinets
Importance of organizing and decluttering cabinets
Organizing and decluttering your kitchen cabinets is essential for maintaining a functional and efficient kitchen space. It offers several benefits, including:
- Maximizing storage space: By organizing and decluttering, you can optimize the available cabinet space and make it easier to find and access items when needed.
- Streamlining meal preparation: Well-organized cabinets with clearly labeled and categorized contents can save you time and effort during meal preparation.
- Eliminating duplicates and expired items: Decluttering allows you to identify and remove expired or duplicate items, ensuring that your cabinets are filled with only essentials.
- Enhancing aesthetics: An organized and clutter-free cabinet interior creates a visually appealing and inviting environment in your kitchen.
Steps to organize and declutter kitchen cabinets
- Empty all cabinets and sort the contents into categories, such as cookware, bakeware, dishes, or food items.
- Assess each item and determine its usefulness and frequency of use. Discard any broken, expired, or duplicate items.
- Clean the cabinets thoroughly, including the interior surfaces, shelves, and drawers.
- Consider using storage solutions such as organizing racks, stacking shelves, or drawer dividers to maximize space and improve accessibility.
- Assign specific cabinets or areas for each category of items based on their frequency of use and accessibility needs.
- Label shelves or use clear containers to help identify and locate items easily.
- Place items back into the cabinets, making sure to arrange them in a logical and organized manner, with frequently used items within reach.
Useful organizing tools and containers
- Stackable wire or plastic shelves
- Drawer dividers
- Spice racks
- Clear storage containers
- Lazy Susans
- Shelf risers
- Hanging hooks or racks
Advantages of using removable wallpaper
Removable wallpaper provides a versatile and temporary option for adding pattern, color, and texture to your kitchen cabinets. Some of the advantages include:
- Easy installation and removal: Removable wallpaper does not require any glue or permanent adhesive, making it simple to install and remove without damaging the cabinet surfaces.
- Versatility: It offers a wide range of patterns, colors, and textures, allowing you to experiment with different styles and update the look of your cabinets easily.
- Concealing imperfections: Removable wallpaper can help disguise any scratches, stains, or discoloration on the cabinet surfaces, providing a quick and affordable solution for a refreshed appearance.
Steps to apply removable wallpaper on kitchen cabinets
- Clean the cabinet surfaces thoroughly to ensure there is no dirt or grease.
- Measure the dimensions of the cabinet doors, drawers, or side panels to determine the amount of wallpaper needed.
- Cut the wallpaper sheets to the measured dimensions, leaving an allowance for trimming.
- Start at one edge of the cabinet surface and peel off a small portion of the backing from the wallpaper.
- Gradually peel off the rest of the backing while aligning and sticking the wallpaper onto the surface. Smooth it out as you go to eliminate air bubbles or wrinkles.
- Use a smoothing tool or a credit card to press out any air bubbles and ensure a smooth, even application.
- Trim any excess wallpaper using a utility knife or scissors.
- Repeat the process for all cabinet surfaces.
Materials needed for using removable wallpaper
- Measuring tape
- Removable wallpaper
- Utility knife or scissors
- Smoothing tool or credit card
Repurposing Cabinets
Creative ways to repurpose kitchen cabinets
If you have old or unused kitchen cabinets, repurposing them can breathe new life into these pieces of furniture. Here are some creative ways to repurpose kitchen cabinets:
- Create a bathroom vanity: Convert a cabinet into a unique and functional vanity for your bathroom. Add a sink, faucet, and countertop to complete the transformation.
- Build a desk or workspace: Remove the cabinet doors and install a desktop or work surface to create a compact and stylish desk area.
- Design a media or entertainment center: Arrange cabinets together to create a custom media center. Add shelves, a TV stand, and storage baskets to accommodate electronics and other media accessories.
- Construct a storage bench: Repurpose a cabinet into a storage bench by attaching a cushion on top and utilizing the cabinet’s interior for storing shoes, blankets, or other items.
- Transform into a bar or serving station: Convert a cabinet into a stylish bar or serving station by adding wine racks, glassware storage, and a countertop.
- Make a pet feeding station: Modify a cabinet to create a dedicated space for pet food and water bowls, along with storage for pet supplies.
Steps for repurposing cabinets
- Determine the desired purpose for repurposing the cabinet and plan the design accordingly.
- Prepare the cabinet by removing any doors, hardware, or shelves that are not required for the new function.
- Make any necessary modifications, such as adding additional shelves, drawers, or partitions based on the intended use.
- Sand the cabinet surfaces to create a smooth base for painting or refinishing, if desired.
- Paint or refinish the cabinet to match the new purpose or desired style.
- Install any additional components, such as sinks, faucets, or countertops if needed.
- Make sure the repurposed cabinet is securely mounted or stabilized to prevent accidents or instability.
Materials needed for repurposing cabinets
- Screwdriver
- Sandpaper
- Paint or refinishing materials
- Additional components based on the new purpose (e.g., countertop, sink, faucet, cushions)
Giving Cabinets a Deep Clean
Benefits of deep cleaning cabinets
Deep cleaning kitchen cabinets is essential for maintaining their appearance, longevity, and functionality. Here are some benefits of giving your cabinets a deep clean:
- Removes built-up grime and grease: Over time, cabinets can accumulate dirt, dust, and grease, making them dull and unappealing. A deep clean removes these residues, restoring the cabinets’ original shine.
- Increases durability: Regular deep cleaning helps prevent damage and deterioration, extending the life of your cabinets.
- Removes unpleasant odors: Cleaning cabinets eliminates musty smells and helps maintain a fresh and pleasant aroma in your kitchen.
- Improves organization and accessibility: A clean and organized cabinet interior makes it easier to find and access items, promoting efficiency in the kitchen.
Steps to deep clean kitchen cabinets
- Empty the cabinets, discarding expired or unwanted items, and set them aside in separate piles.
- Mix a solution of warm water and mild dish soap or a gentle cleaner appropriate for your cabinet material.
- Wet a sponge or microfiber cloth in the cleaning solution, wring out excess moisture, and wipe down the interior and exterior surfaces of the cabinets.
- Pay special attention to areas prone to grease build-up, such as around the stove or sink.
- For stubborn stains or greasy residue, create a paste using baking soda and water and apply it to the affected areas. Gently scrub with a soft brush or sponge to remove the stains.
- Wipe down the shelves, drawers, and any removable components, such as hardware or inserts.
- Rinse all surfaces with a clean, damp cloth to remove any soap or cleaner residue.
- Dry the cabinets thoroughly using a clean, dry cloth or allow them to air dry completely before replacing the items.
Recommended cleaning products for cabinets
- Mild dish soap
- All-purpose cleaner suitable for your cabinet material
- Baking soda
- Microfiber cloths or sponges
- Soft brush or toothbrush